Search This Blog

Translate

Thursday 30 April 2015

How to root QMobile Noir Z8


How to root QMobile Noir Z8


As we all know QMobile is known for its mediatek powered smartphones with a very aggressive pricing strategy. But recently QMobile started to produce, or started to import to be more precise, smartphones that are powered by Qualcomm Snapdragon SoC. QMobile Noir Z8 is also one of these devices which are powered by Qualcomm Snapdragon 410 and has very good specs.
Enough of the talking, Today I’ll share with you how you can root QMobile Noir Z8. You will require a PC and some files to be downloaded in it. so lets get started.

Prerequisites:                                                                                                                         

A PC with 7zip or any other archive extractor.

  1. A USB Cable.
  2. ADB Drivers – Download
  3. Root package – Download

Instructions:                                                                                                                         

  1. First of all you have to download and install adb drivers in your PC. Link given above.
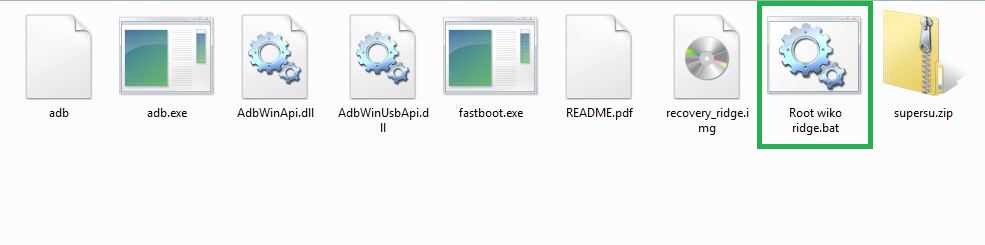
  2. Download the root package and extract it to desktop. or anywhere you like.
  3. Now turn on USB Debugging 

    (How to enable USB Debugging mode on Android devices)

  4. Connect your phone with PC via USB cable.
  5. Double-click Root wiko ridge batch file and press any key on your pc.How to root Noir Z8
  6. If you have drivers installed, your QMobile Noir Z8 with Reboot into custom recovery. This does not install the cwm recovery because its not working properly.
  7. When your phone boots into cwm recovery, press any key on your pc to continue.
  8. Now your phone will start to show some weird colors but you don’t have to worry, its notmal. Just Press Volume down once and then press power button. Your phone will reboot and it should now be rooted.
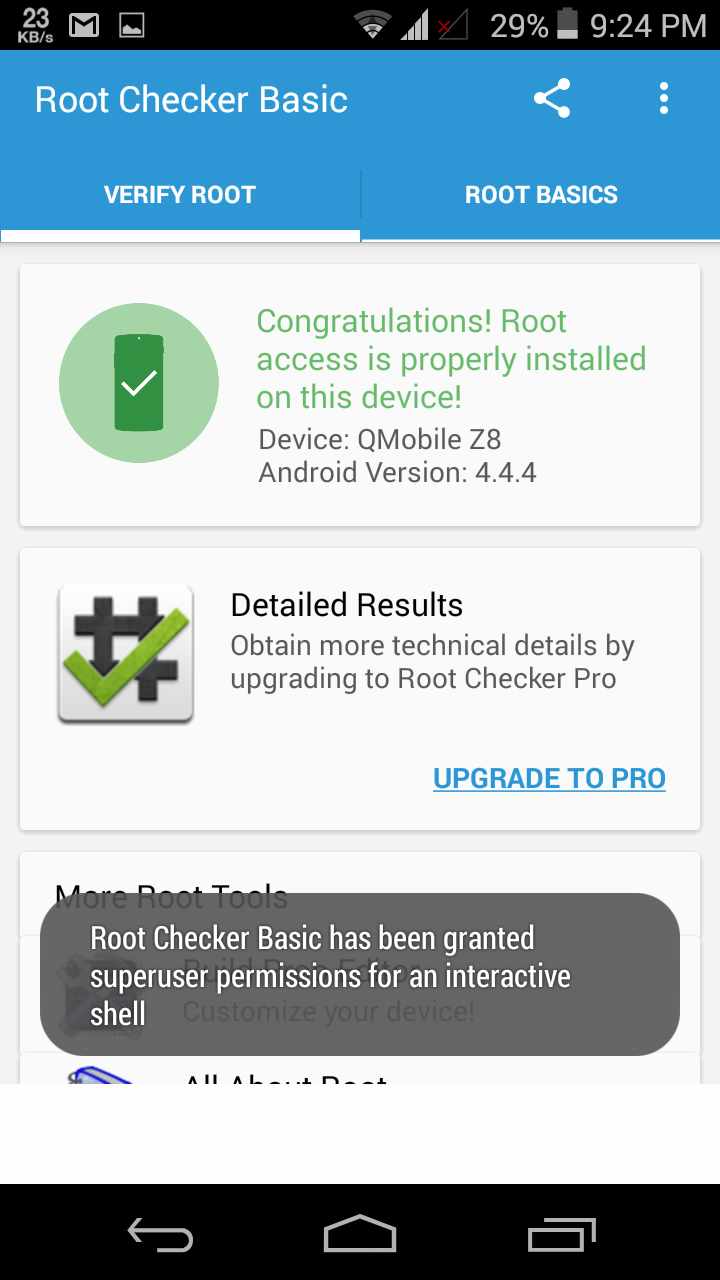
Congratulations! You have successfully rooted your QMobile Noir Z8. You can check the root via Root checker app and this would be the output.
Root QMobile Noir Z8


How to enable USB Debugging mode on Android devices


1. Android 2.0-2.3.x
Settings > Applications > Development > USB Debugging.
2. Android 3.0- 4.1.x
Settings > Developer Options > USB Debugging.

3. Android 4.2.x and higher.
In Android 4.2 and higher versions, the Developer Options menu and USB Debugging option have been hidden. In former 4.X versions of Android, USB Debugging option is under Developer Options menu.

    First, you need to enable "Developer Options Menu".

  1. Click Menu button to enter into App drawer.
  2. Go to "Settings".
  3. Scroll down to the bottom and tap "About phone" or "About tablet",
  4. Scroll down to the bottom of the "About phone" and locate the "Build Number" field.
  5. Tap the Build number field seven times to enable Developer Options. Tap a few times and you'll see a countdown that reads "You are now 3 steps away from being a developer."
  6. When you are done, you'll see the message "You are now a developer!".
  7. Tap the Back button and you'll see the Developer options menu under System on your Settings screen.
  8. Now, you can enable USB Debugging mode.

  9. Go to Settings>Developer Options>USB Debugging. Tap the USB Debugging checkbox.
4. Android 5.0 Lollipop
To enable USB Debugging on Android 5.0 Lollipop is the same as Android 4.2.x.
  1. Settings > About Phone > Build number > Tap it 7 times to become developer;
  2. How to enable usb debugging mode on android 4.2.x and higher?
  3. Settings > Developer Options > USB Debugging.
  4. How to enable usb debugging mode on android 4.2.x and higher?

Note: On Android 4.2 and newer, Developer options is hidden by default. To make it available, go to Settings > About phone and tap Build number seven times. Return to the previous screen to find Developer options.
In Android 4.2.2, when you connect your PC to your Android device via USB, Android gets your PC's RSA key (an identifier token). In Android 4.2.2, when you have USB debugging enabled, this now causes a prompt to appear on connection, seen below.